

Make your own box clutch!
I’ve seen so many cute designer box clutches that I’d love to own. But they are way out of my budget. So I decided to try my hand at making my own. 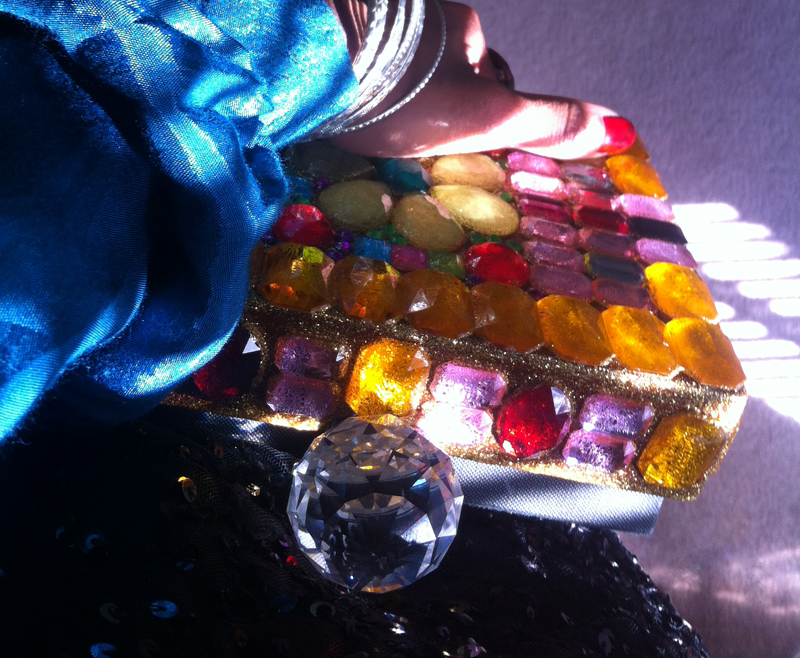
This was more about doing something for fun. My DIY box clutch won’t actually become part of my wardrobe. I won’t be stepping out with it at any point in time. I think it’s cute but it’s obviously a crafts project and not a bag.
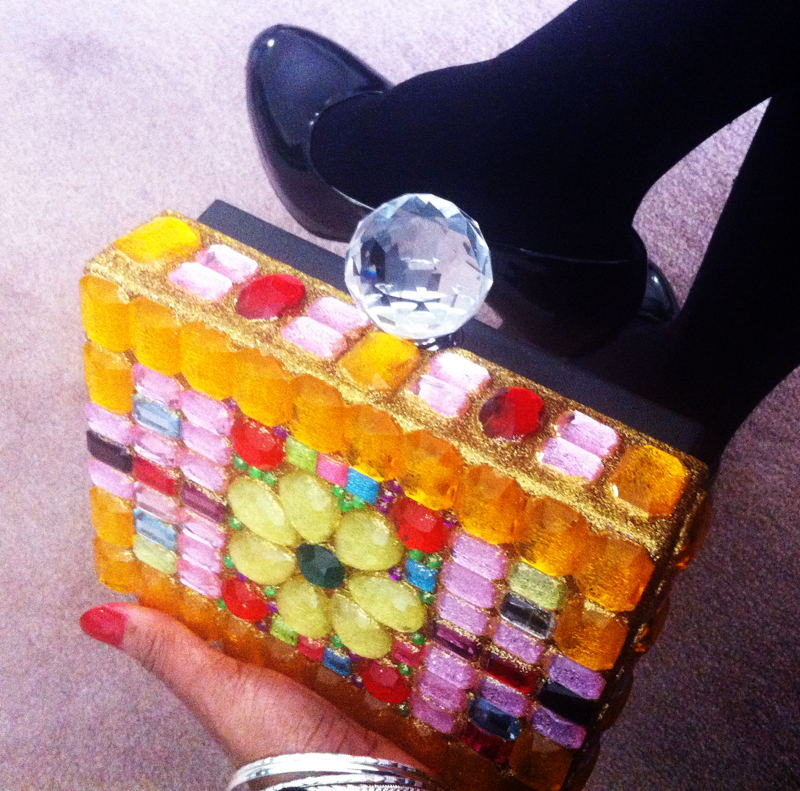
It’s made out of a wooden box that I found in my closet. The box was a container for an Alexander Julian Manicure and Wallet Set that I purchased for the hubby a few years back. 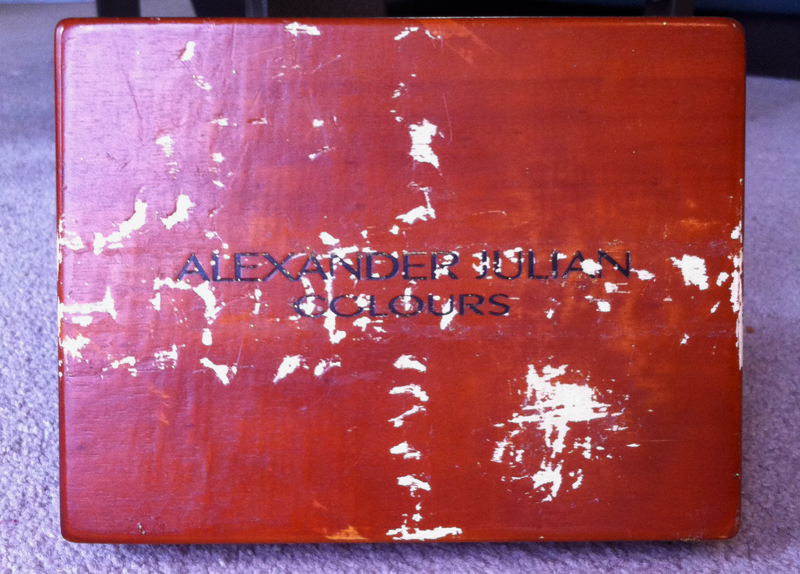
 I’d been wanting to attempt to make a box clutch. So much so I had gone shopping at my local Michaels to look for something I could use. But I found nothing so I decided to scratch the idea. I had forgotten all about my desire to make a box clutch until I found the Alexander Julian colors box in the closet. I grabbed it and went downstairs and started sticking on some cheap gems I’d bought at Michaels the day I went looking for something square shaped to make a box clutch.
This was how my box clutch design started taking shape…
Unfortunately I ran out of the Michael’s gems so I had to order some cheap gems from Amazon hoping it would contain reasonably similar colors and sizes. Unfortunately it did not. So I had to pull off the gems I’d already stuck on and start over with the gems from Amazon.
After a few days of sticking on gems and gold glitter…
Does my so-called box clutch compare to the cute designer box clutches from labels like Charlotte Olympia and Olympia Le-Tan? No. Is it obviously an amateur crafts project that any little girl can do? Yes. But you know what, I enjoyed making it and I think that what’s important–to have fun with the days of your life. Why should I sit around and mope about the fact that I can’t afford a Charlotte Olympia clutch?

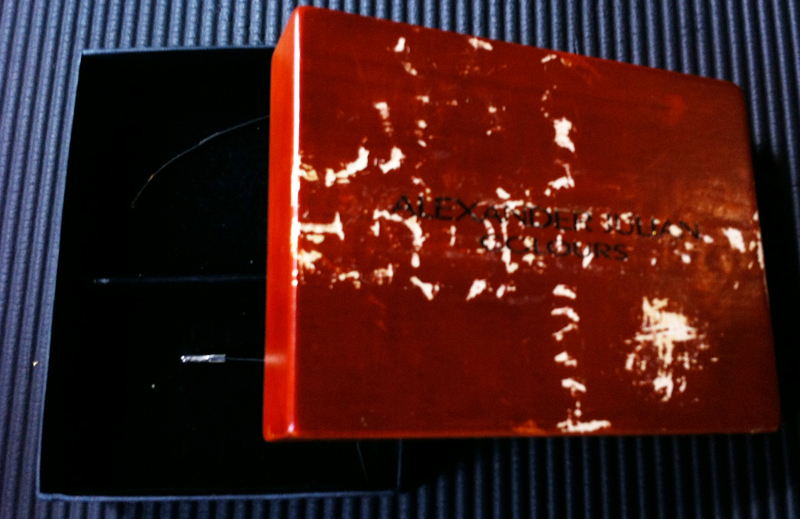
But what about the inside?
Well, I wanted to line the inside but I couldn’t quite get that worked out. So I left the inside as it was. As far as this being actually able to contain anything, it does hold a few things.
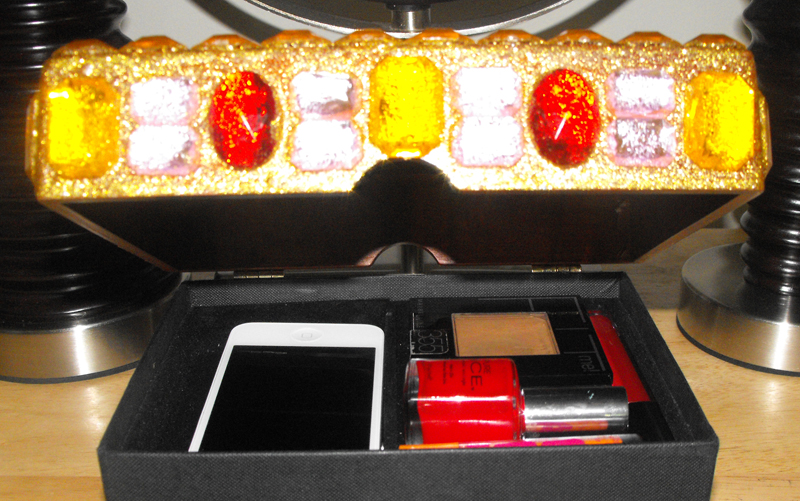
But they only stay put if I carry it flat. If I hold it upright things go a little haywire.
How I made it…
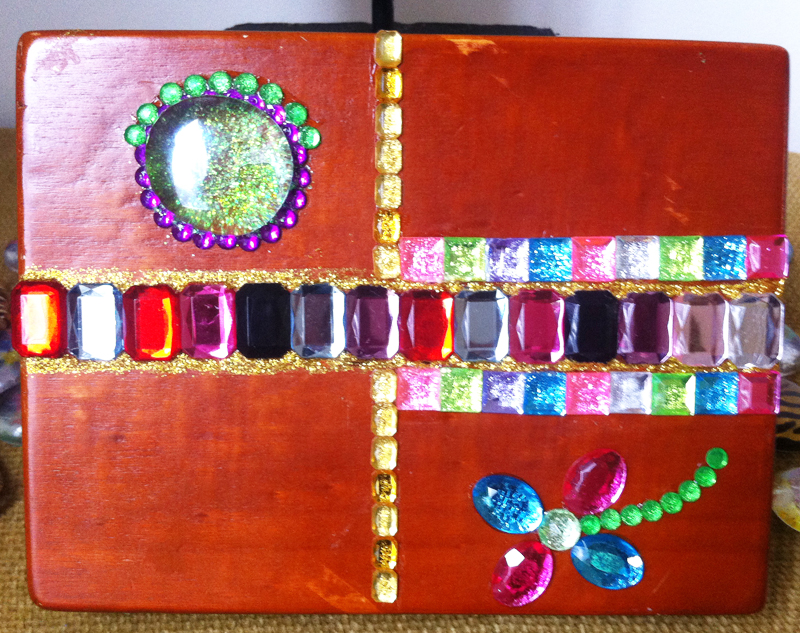
Basically I used E6000® Craft Adhesive to affix gems from a package of Darice Big Bling Shapes Gem Value Pack Rhinestones to the box top and sides (excluding one of the long sides). I did the top first and let that dry. Then I filled in the gaps at the top with gold glitter glue. The gold glitter glue I used was the Sargent Art 22-1881 4-Ounce Glitter Glue. It probably wasn’t the best choice given it’s washable; but that’s what I purchased from Amazon for my trial.
The glitter glue needed a good few hours to dry so I had to leave it overnight and resume the next day. I glued on two craft hinges to connect the two parts of the box and create the bottom of the clutch. Yes I agree, it’s unsightly and for a serious project you don’t want that gap and that half moon hole. But this was a for-fun deal so I was satisfied just sticking on the hinges and calling it done. I stuck them on with glue because there wasn’t enough depth to either the top or bottom parts of the box to take the screws that came with the hinges.
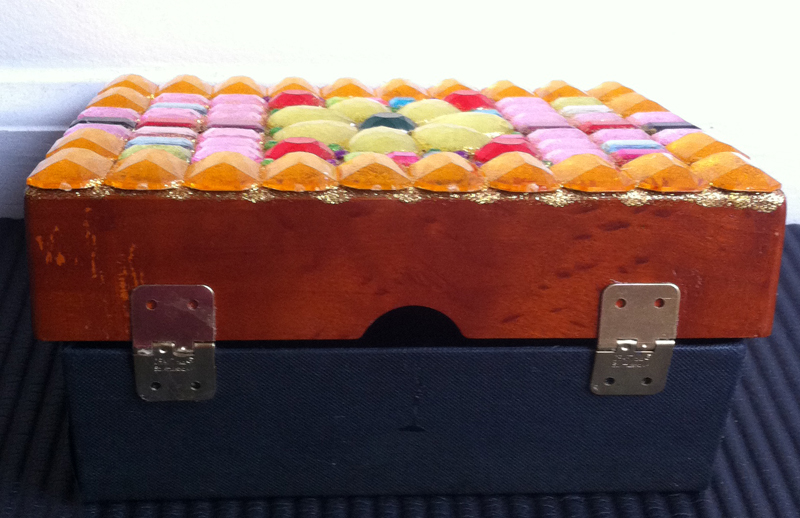
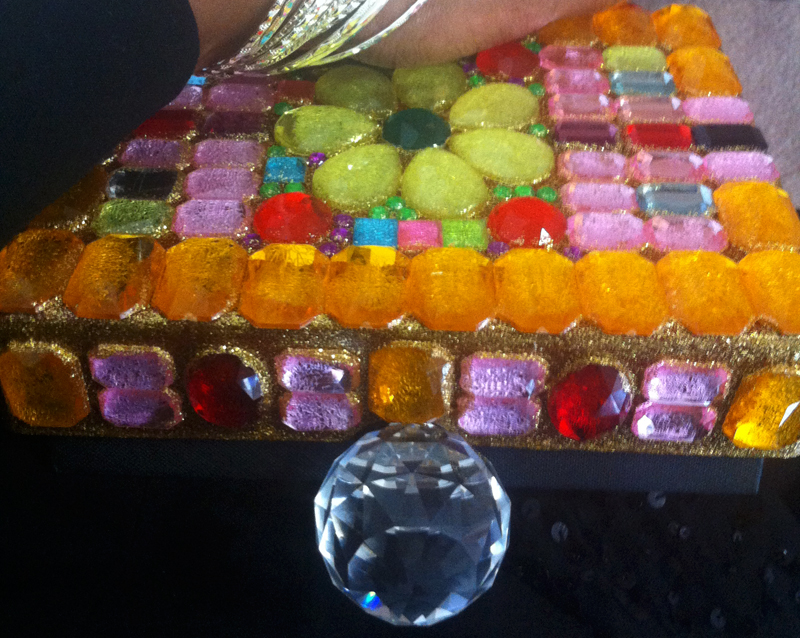
So once the glue dried and the hinges were secure, I affixed gems to one long side and then both short sides of the top part of the box. I let that dry then filled in the gap with gold glitter glue and left overnight again. Then I glued on the knob and let that dry. I would have lined the inside if I could have figured out how to do it neatly; but I couldn’t figure that out so I decided to call the clutch done once everything was dry and secure.
Like I said this was just for fun and I won’t actually use this as a clutch. It will probably end up being displayed on my dresser or being used to store the DIY rings I made out of the some of the same gems. Should I ever be able to afford to do so I will buy one of those cute designer clutch purses. In the meantime, I’ll attempt another box clutch at some point once I figure out the best material for the actual box.